A fantastic alternative to traditional woodboard flooring, there are many reasons why you might want to install engineered wood flooring in your home. But if you plan on laying engineered wood flooring yourself, you might not be sure where to start.
Fortunately, with the right tools and know-how, laying an engineered wood floor is a relatively simple process, provided you take the time required to do this sort of project properly.
So, if you want to know how to fit engineered wood flooring in your home, take a look at our in-depth guide below to learn how to prepare your subfloor, install your underlay, and how to lay both click and glue down engineered wood boards.
How to lay engineered wood flooring: What you’ll need
First of all, before discussing the process that goes into fitting engineered wood flooring, it’s important to lay out the tools and materials you’ll need to complete the installation in one go.
We recommend acquiring all of the following before beginning your installation:
- Your chosen wood planks
- An underlay (if required)
- A moisture barrier (if installing on concrete)
- Floor levelling compound (if required)
- Wood adhesive (if required)
- A tape measure
- Circular or hand saw
- Utility knife
- Moisture metre
- Pencil
- Rubber mallet
- Spirit level
- Spacers
Laying an engineered wood floor: Acclimatising your boards
Once you have all of the equipment you need sorted, your next step will be to let your new boards acclimatise to the temperature and humidity of the room they’ll be installed in. Doing so will provide a better installation and minimise the chances of any boards lifting or buckling as they settle into place.
When your boards are delivered, keep their boxes closed and stack them neatly in their installation room, being careful to keep them out of direct sunlight. Let them sit for 5-7 days, depending on manufacturer recommendations, and then you’re good to begin installing.
Laying an engineered wood floor: Subfloor preparation
Next, after your boards have acclimatised to your room, you’ll want to prepare their subfloor for installation. So, if you haven’t already done so, remove all furniture from the room, tear up your old floor, and then thoroughly hoover and clean the space to remove any debris and dust.
From here, you’ll then want to use your spirit level to check the level of your floor, noting any dips or bumps as you go. Hopefully, your floor will be relatively level, however, if not, then you should sand any bumps flat or use the appropriate floor levelling compound to fill in any dips or cracks present.
Finally, once you’re satisfied with the state of your subfloor, be sure to check the moisture levels using your moisture meter. Engineered wood should only be placed on floors containing a moisture level matching the manufacturer’s recommendations. If the moisture levels are too high, you will need to install a moisture barrier before the underlay.
How to lay engineered wood flooring: Installing click wood boards
With your subfloor level and dry, it’s finally time to start installing your engineered wood boards, beginning with click-and-lock engineered wood boards, which are the easiest form of engineered wood to install:
1. Installing your underlay
While certain brands of engineered wood don’t require an underlay to be installed beneath their planks, with click wood boards, this is absolutely essential to protect against moisture and improve floor stability.
Taking your underlay of choice, unroll it across the length of the room and then carefully cut this strip to size using your utility knife and tape measure for an accurate fit, then repeat the process until your underlay snuggly fits the entirety of your floor.
You may need to cut your final underlay roll to fit the remaining space, so make sure you measure correctly to avoid your rows overlapping. Finally, once you have your underlay ready, apply an even layer of flooring adhesive to your subfloor and glue it in place.
2. Laying your first row
With your underlay in place, you’re ready to lay your first row of boards. Starting in a corner of your choice, place your first board against the wall click-side first. Then, taking your next plank, insert it into place at a slight angle until it locks in. Lower it into place and then use your rubber mallet to gently tap the boards together for a firm connection.
From here, repeat this process until you reach the other wall, at which point you will likely need to cut your next plank to fit the space (we recommend doing this after all other planks have been laid so you can cut your edge planks in one go). Finish by placing 10mm spacers between your planks and the wall edge and then move on to your next row.
3. Finishing your installation
Keep repeating step two until the only tiles you have left to install require some form of cut to be made. Here, you’ll want to use your tape measure and pencil to measure and mark the required cuts on your planks and then use your circular or hand saw to cut them to size (be sure to number your planks so you know where in the room to install them).
Then, once the last plank has been installed, remove all your spacers and leave your newly laid engineered wood floor to settle for 48 hours
How to lay engineered wood flooring: Glue down installations
Although the click system is the easiest type of engineered wood to install by hand, if you prefer a slightly sturdier version, then it is possible to invest in a glue-down alternative. And the good news is that glueing engineered wood flooring down is a very similar process to installing click flooring, but there are a few key differences:
Installing your underlay – following the same process for click planks, carefully cut and measure your underlay to fit the room before adhering it to the floor.
Installing your planks – starting from your corner of choice, apply an even spread of adhesive to your underlay and along the connecting line of your planks and then firmly press your first plank into place. Lay the following board next to it, wipe off any adhesive that rises out the join when pressed together, and then repeat the process until your first adhesive layer is covered. Repat the process until the only boards left to install require cutting.
Cut your boards – cut your final boards as you would for click flooring, then apply adhesive to each board area in turn, inserting your boards firmly for a seamless and steady finish.
Start browsing our engineered wood range today
And there you have it; now you know how to fit engineered wood flooring properly for a professional finish in your own home. As we said right at the start, it’s important not to rush this process. Instead, be patient, take your time, and before you know it you’ll have a brand new floor with a showroom finish.
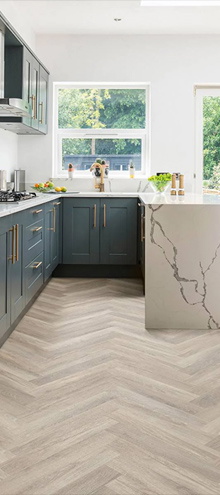
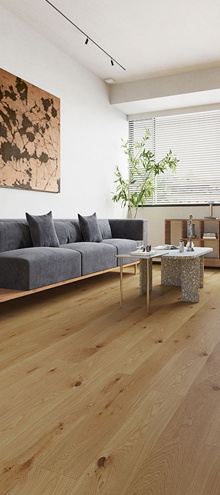
Naturally, in order to start your installation, you’ll first need to purchase your engineered wood boards of choice. And for that, look no further than the Flooring King range! With both herringbone plank and straight plank engineered wood on offer, you’re sure to find something to suit your home décor desires.
Don’t forget to visit our flooring blog as well for more articles like this one, including detailed guides on what engineered wood is and how to measure your floor so that you buy the right amount of flooring material for your installation.

