


If you’re familiar with LVT flooring, and you’re considering laying it in your home, then you’re probably aware that there are several different LVT tile installation options to choose from.
The more traditional method is known as glue-down LVT – the fitting process is pretty self-explanatory, as, yes, it involves gluing down your LVT. However, this style of LVT can also be tricky to get a handle on, especially for first-time DIYers, which is why you might want to consider laying LVT click flooring planks instead!
Designed to be quick and easy to install, click LVT is an excellent flooring choice for anyone who wants to lay their new floor themselves without running the risk of making expensive mistakes or paying for a professional floorer.
Take a look at our guide on how to fit LVT click flooring below for all the information you need on installing this floor type, as well as tips and advice for fitting LVT click flooring of varying styles.
What tools will you need when fitting LVT flooring?
First things first, before you even start the process of laying LVT click flooring, you need to make sure you have the right tools to hand. Fortunately, the simplicity of click LVT means that you don’t need any expensive pieces of equipment to complete the installation process. Instead, you should only need the following tools:
- Your LVT boards
- LVT underlay (if required)
- LVT underlay adhesive (if required)
- Pencil
- Tape measure
- A saw (if you need to make cuts)
- Stanley knife
- Spacers
- Rubber mallet
- Spirit level
- Sandpaper
1. Preparing your subfloor
Now that you have your tools to hand and ready to go, it’s time to start preparing your room for its new floor. So, naturally, this means removing all your furniture, taking up the old floor (if there is one), and hoovering the floor clear of dust and debris.
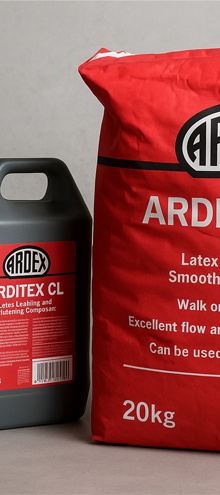
Next, once the area is clean, take your spirit level and carefully check the whole of your subfloor is level. If you come across any lumps or dips, these will need to be sanded down or filled in with an appropriate flooring screed to ensure a smooth finish for your LVT.
If you need to level your subfloor, make sure that you leave your freshly applied screed for the recommended drying time to ensure your subfloor is stable for your LVT installation.
2. Acclimatising your tiles
Next, with your subfloor ready to go, you’ll need to order your LVT and leave your new tiles in the room to acclimatise to its natural temperature. Doing so helps to minimise the potential for excessive movement and bending in your planks after installation and reduces the likelihood that bowing will occur.
Take your boxes and stack them in groups of three outside of direct sunlight, turn off any standard or underfloor heating in the room, and then leave them for at least 48 hours before installation.
And if you’re concerned about using underfloor heating with LVT, don’t worry – you’ll be able to properly acclimatise your tiles to your underflooring heating system once they’ve been correctly laid down.
3. Installing your underlay
With all the initial preparation done, it’s now finally time to start the installation process for your LVT click planks – starting with the underlay that will sit beneath your tiles to act as a support layer and moisture barrier.
Now, if you’ve decided to purchase LVT click flooring that comes with a pre-installed underlay on each plank, then you can skip this step and move on to the main installation process below.
If, however, you’ve purchased a standard click LVT with no underlay, you’ll need to buy one separately and lay it yourself.
To do so, unroll your underlay at a right angle to the direction you want to run your LVT tiles, cut it to length, and then repeat the process until you have an underlay that fits the size and shape of your room.
From here, if your underlay is a pre-stick version, you can push it into place. Otherwise, you’ll need to glue it down by spreading a suitable adhesive across your subfloor and pressing it down to ensure the adhesive spreads evenly and locks your underlay in place. Then simply wait till this adhesive has dried before moving on to the next step.
Finally, as part of this process, you may have to cut around awkwardly shaped corners and radiator pipes, so do not rush this step. Instead, take your time and use your Stanley knife, tape measure, and pencil to measure, mark, and cut your underlay to the right size for a snug fit.
4. Fitting the LVT together
Ok, now that all of the pre-prep is complete, it’s time to actually fit your click LVT tiles into place – though how you do this may vary slightly depending on the type of click LVT you choose to go with.
However, no matter what click LVT you’re installing, make sure you do all of the following when fitting your planks together:
- Lay your LVT tiles at a right angle to the direction of your underlay.
- Start from the corner farthest from the door.
- Place spacers between your planks and the wall
- Should you need to lay your LVT continuously for more than 7m, make sure you put a threshold strip in place at the 7m mark and apply spacers between this and your planks.
- When cutting plank to complete a row, make sure you leave a gap of 7-10mm for your spacers.
- If you plan to misalign your plank layout for a more natural wood installation aesthetic, remember to measure, mark, score, and snap your planks to the right size so that they fit properly at the top or base of each row.
Laying angle click LVT flooring
Beginning with the most modern form of LVT click planking, angle click flooring requires you to gently slot your planks into place by inserting them at an angle and then lowering them to the floor.
- Start in the corner furthest from the door.
- Lay your first plank with the long side facing the wall
- Position the next plank above its short side, slotting it in at 45 degrees and then lowering it flat.
- Smooth the plank join out with your hand for a flush finish and then move on to the next one.
- Rinse and repeat this process until the row is complete.
From here, you’ll want to do the same for your second row, though you should wait until your second row is complete before attaching it to your first – that way you can join your rows together lengthways in one go.
Again, repeat the process until your floor is complete, then remove the spacers and leave it to settle for at least a full 24 hours before walking on it.
Laying fold down click LVT flooring
Similarly to angle click LVT, fold down or tap LVT still requires you to slot your planks into place, but instead of locking them together through the angle of installation, you instead use your hand or a rubber mallet to tap them flush.
Fortunately, this is the only real variation between the two installation methods, and you can follow the same process as you would for angled click LVT. Just remember to apply a flush finish to your planks after each one is laid to keep your new floor level and consistent.
5. Cutting your LVT tiles
As we already mentioned in our section on installing your LVT underlay, it may be the case you need to make cuts to fit around awkward pipes, doors, and corners. Naturally, this means you’ll need to cut your LVT planks to match.
The good news is that doing so is not nearly as tricky as it might seem, and we have a whole guide around how to cut LVT flooring that goes into much more detail on the process.
Find the right type of click LVT in our range
With all that out of the way, you should have all the information you need to start fitting click LVT flooring in your home today. Of course, in order to begin the process, you’ll first need to buy your desired tiles – which is exactly where the Flooring King LVT tile range comes in!
From classic wood LVT to gorgeous stone LVT, we have all kinds of LVT styles on offer. Take your time browsing to find the perfect floor design for your home, and don’t forget to visit our blog if you’re interested to learn more about the cost of installing LVT, how to fit standard LVT flooring, and much more!


