
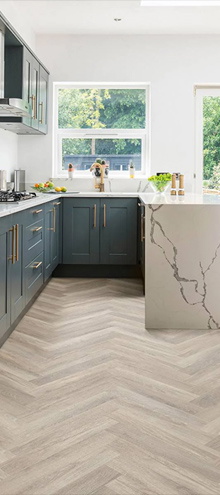


One of the most popular styles of flooring layout available, a herringbone pattern floor is a fantastic way to add a touch of stylistic complexity to any space in your home, especially if you’re looking for ways to make a small room seem bigger.
However, normally a classic herringbone pattern floor would involve the use of traditional hardwood planks. But this sort of flooring can be very costly and time-consuming to install correctly – which is what makes laminate herringbone flooring such a good alternative.
Cheaper to buy and far more DIY friendly to setup, laying herringbone laminate flooring yourself can not only help you save money, but it’ll give you the kind of satisfaction that only comes from installing a gorgeous-looking laminate floor yourself.
But how do you go about laying herringbone laminate planks to begin with, and how does it differ from installing a standard laminate floor? Learn about all this and more in our detailed guide on how to lay herringbone laminate flooring below!
Why should you consider laying herringbone laminate flooring?
As we’ve just mentioned, although traditional herringbone floors look amazing, their all-wood construction makes them very expensive to buy and hard to lay down yourself without proper DIY and carpentry experience.
Laying herringbone laminate, on the other hand, is a cost-effective and budget-friendly alternative that can save you a decent amount of money while still leaving you with a durable floor that’s stunning to look at!
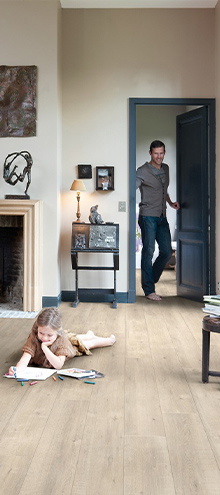
Simply put, a herringbone laminate floor gives you the opportunity to enjoy a more sophisticated and versatile flooring layout, one that can suit both contemporary and older house aesthetics, but on a much tighter budget.
What tools do you need for laying herringbone laminate flooring?
Much like laying a standard laminate floor, correctly laying a herringbone laminate floor requires a specific set of tools to get the job done. So, if you want to try your hand at this sort of DIY project, here is a comprehensive list of all the tools you’ll need before you get started:
- Your herringbone laminate boards
- An underlay (if required)
- A straight edge
- A Stanley knife
- A jigsaw
- Spacers
- A tape measure
- Pencil
- Tap block and hammer
How to install herringbone laminate flooring
With all the necessary tools in hand, it’s time to start laying your new herringbone patterned floor. Here are the five essential steps you need to follow when laying herringbone laminate in your home if you want to create a new floor in this style with a flush finish:
1. Prep your subfloor
First things first, before you can actually install your new herringbone laminate, you’ll need to make sure that the subfloor of the room you’re working in is ready to have a new floor laid on top of it.
If you haven’t already, take up your old flooring and then go through the process of levelling your floor to smooth out any bumps and dips – that way, you can be sure your new laminate won’t warp and crack after installation due to uneven foundations.
2. Acclimatise your boards and clear the room
Next up, once your subfloor has been fully prepared for your new planks, you’ll want to empty the room entirely, give your subfloor a thorough clean, and then leave your new planks in the room for 48 hours to acclimatise them to their new environment.
Like many types of flooring material, laminate flooring will expand when exposed to different room temperatures and humidity levels. So, by leaving your planks in the room you want to install them in, and out of direct sunlight, they’ll get a chance to grow and contract freely before installation, again reducing the likelihood of accidental warping and cracking once they’ve been laid.
3. Separate your planks
Okay, now that your room is clear, and your planks have been properly acclimatised, it’s time to separate them into your A planks and your B planks – this will make the installation of your herringbone laminate faster and simpler.
In order to recreate a traditional herringbone style, you’ll need to lay your planks in a zigzag pattern, with your A planks forming one half of the classic herringbone V, and your B planks the other.
So, take the time to note which planks are classed as A and B (or the equivalent identifier for your chosen laminate boards) and sort them into the relevant piles on either side of you before you start.
4. Laying herringbone laminate correctly
With your laminate planks sorted, it’s now finally time to begin the installation process. If required, you should begin by laying down your flooring underlay by cutting it into strips, fitting these to match your floor shape, and then glueing each strip into place.
Once you’ve done this, or if your chosen laminate does’nt require an underlay to be installed to begin with, you can then move on to creating your first row of herringbone laminate.
To do so, take one A plank and one B plank, and attach the short end of the B plank to the long side of the A plank to form a V, with its point facing you. Then add another V layer on the outside edge of the first, locking it into place, and then a final, third V so that you have three layers of herringbone locked in place.
Next, use your straight edge and a pencil to mark an even line that runs roughly halfway across your V planking and then use your jigsaw to cut along this line. This will leave you with a small and complete V that you can place against the edge of your room’s far wall, separate from touching the edge by your spacers.
Repeat this process until you have several Vs lining the far wall with their points facing you – making straight cuts on the sides of your corner Vs so that they fit flush with the edges of the room – and then proceed to start laying your planks down the rest of the room as you would with a standard laminate floor – using your tapping block and hammer to ensure everything is in place and flush to a finish.
5. Let your floor settle
Finally, having laid all your planks, remove your spacers and then let your floor settle for 24 hours before walking on it, giving it a brief hoover, and bringing your furniture back in.
Find the right herringbone floor in our range
With all the essential steps covered, you should now know how to fit herringbone laminate flooring in your home properly so that you’re left with a floor that looks terrific and enhances the feel of the space.
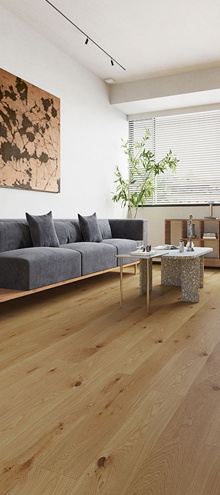
Of course, to do this you’ll need to buy the laminate planks to begin with, and that’s where Flooring King comes in. From natural laminates to dark laminates, there’s something for everyone in our range. Start browsing today to see what we have on offer and don’t forget to check out our flooring blog for more DIY guides like this one!


