


Whether it’s laminate flooring, LVT tiles, or engineered wood boards, all flooring types need a stable subfloor beneath them to ensure a flush finish and a comfortable walking surface.
But while that might seem achievable with a soft underlay on a brand-new concrete surface, if you’re renovating your old flooring or living in a particularly old building, your subfloor might not be nearly as level as it appears.
So, if you want to ensure your new floor has a square finish and a smooth installation, then you’ll want to look into levelling your floor before you move on to installing your new tiles – and our guide is here to help you do just that!
From tips on how to level flooring from scratch, and advice around how to level floorboards before laying laminate flooring or LVT over the top, we’ve covered everything you need to know on the topic below.
Why is levelling a floor important?
Besides the obvious of keeping the floors in your home level and dip-free, levelling your floor before laying down your new boards and tiles is essential for stopping raised planks and cracked boards from becoming an issue in the future.
The occasional subfloor dip or bump might not seem like such a big deal when you’re installing your new vinyl floor. But over time, these bumps can spread uneven pressure through your flooring, making it unsteady and increasing the chances of floor damage.
What tools do you need when levelling a floor?
Like when measuring your floor, if you’re planning on levelling your subfloor yourself, then you’re going to need the right tools for the job. Here are the essential tools we recommend using when smoothing your floor out:
- A 2m spirit level
- A tape measure or small steel ruler
- A screed float
- Sandpaper or electric sander
- Hammer
- Nails
- Flooring screed
- Wood dividers
- Wood filler and sealer
- Subfloor backing board
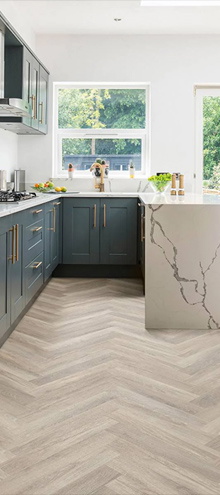
How to level a floor for laminate, LVT, and engineered wood
Ready to learn how to level flooring the right way? Follow our step-by-step guide below to get started:
1. Prepare the space
First things first, before you can actually start levelling your floor, you need to clear the space of all furniture and take up your old floor (if necessary). So, if you’ve not done so already, move all of the furniture out of the room, and dispose of whatever flooring is currently in the room so that the subfloor is exposed.
Once your room is empty, you should clean your floor thoroughly. Wipe away any grease stains and hoover up any dust so that your subfloor is free of contaminants, and then get ready to fix any cracks that are present.
2. Repair any subfloor cracks
While cleaning your floor, you may have noticed one or more cracks here and there. But rather than leaving these alone and installing your floor on top of them, it’s important to take the time to fill them in with a matching filler and sealer.
Again, like levelling your floor, filling in subfloor cracks will improve the structural integrity of your new floor and reduce the chances of uneven surfaces and damage after installation.
3. Check your subfloor is level
Having filled in your subfloor cracks and allowing the filler to dry, it’s now time to actually check the level of your floor.
Taking your spirit level, go across the entirety of the room and compare the smoothness of your subfloor surface to how your spirit level sits.
If your spirit level bubbles are not centred, or there’s a notable gap between it and the floor, make a note of the height/depth of these bumps and dips and then move on until you’ve analysed the whole of your floor. This should give you a pretty good idea of how even your subfloor is, and if you’re lucky, it may just be a few areas that need levelling.
However, if you’ve found that your spirit level is continuously showing your floor to be sloping in one direction, it may need to be fully levelled. Anything below 0.5 inches is fine, but any more than this and you’ll have a bigger job on your hand.
4. Sand down any bumps
Having checked your floor for bumps and slopes, your next step should be to sand down any raised areas to an even level. For this, we’d definitely recommend using an electric sander as manual sanding will take far longer.
Take your time moving from bump to bump and carefully file them down to a satisfactory height. Then, once you’re satisfied, check their level, then hoover and clean your floor again in preparation for applying any floor screed.
5. Apply your flooring screed
Finally, with your floor cleaned and sanded, it’s time to apply your floor levelling screed. Floor screed is a specific compound designed to seamlessly fill in any dips and accurately raise a floor with minimal effort.
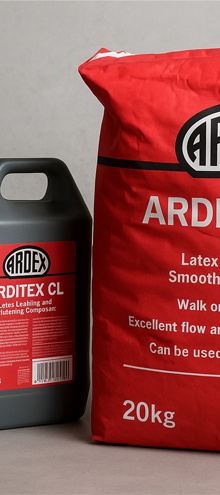
Taking your floor screed of choice (we’d personally suggest an Ardex screed or Bostik screed from our self-levelling screed range), mix as instructed by your chosen product and then apply the recommended volume for the depth of each dip and use your screed float to level off any excess.
Alternatively, if your entire floor needs levelling, calculate the overall floor area and then apply the recommended amount for this size space – again using your screed float to level the edges and ensure a smooth finish.
Lastly, with your screed applied, leave it to set for at least the full drying time before walking on it, and then repeat step two to ensure that there are no remaining dips and bumps.
All finished? Enjoy your nice level floor, before you head on over to our guides on how to lay glue-down LVT flooring and installing engineered wood flooring depending on your needs!
How to level floorboards
While most floors will be laid over a concrete subfloor, it is possible to lay laminate and LVT over floorboards, provided they’re in good condition. Here’s our advice on how to level floorboards correctly:
1. Check the quality of your boards
To start with, it’s very important that you check the overall quality of your floorboards, and the support joists beneath them for warping, cracks, and possible rot. While you will be installing a backboard over the top of your floorboards, any defects need to be repaired now for a firm foundation.
2. Repair or replace any damaged boards and joists
If you do find any damaged boards and joists in your old floorboards, then, naturally, you will need to repair or replace them.
For floorboards, this is as simple as filling in any small cracks with an appropriate wood filler or removing warped or broken boards and nailing a new one in place – and the same should be done for any boards with visibly large dips.
However, if you find your flooring joists are damaged, rotten, or bowed – and you’re not confident in your carpentry skill – then you’re best employing the help of a professional carpenter or joiner to make these repairs for you.
3. Check your floorboards are level
With any essential repairs made, your next step is to check the level of your floorboards. As with checking a concrete subfloor, use your spirit level to assess how even your floorboards are, noting any dips and bumps as you go.
4. Levelling and sealing your floorboards
Now that your floorboard levels have been checked, you’ll again need to take your sander and smooth down any bumps that are present. Alternatively, if your floorboards are uneven in general, then note down the deepest dip and sand your floorboards to this level for a flush finish.
Once this is complete and you’ve hoovered up any wood shavings, you can then apply your wood sealer as an added layer of protection, leaving it to dry fully before installing your backboard.
5. Install your flooring backboard
Finally, to complete your floorboard levelling, you will need to apply a flooring backboard to your planks. While your planks might be level now, there’s no guarantee they’ll stay this way forever, which makes installing a backboard essential.
Starting from the centre of your floor and moving outwards, nail your backboards in place until the entirety of your floor has been covered, and then leave it to settle for at least 24 hours before installing your new flooring.
Should I hire a professional to level my floor?
As you can see, it’s certainly possible for you to level your floor yourself. However, the larger the area of floor you need to level, the bigger and trickier the job can become – and unlike installing click LVT, if you make a mistake, it can be difficult to fix.
So, if your floor needs more than a few spots levelling, then we’d recommend hiring a professional to do the job instead to avoid any costly levelling mistakes. And as an added bonus, they may be able to point out why your subfloor is cracked or sagging in the first place, letting you address any unknown foundation and support issues now before they get any worse!
Find your new floor in our range
And there you have it! Hopefully, you should now have a much better understanding of how to level a floor yourself, and whether or not you should employ a professional floorer to do the job for you.
But regardless of how much levelling your floor may require, it won’t matter too much if you don’t have your new flooring to go over it – which is why you should start browsing the Flooring King range today!
From specialist LVT to classic natural wooden laminate, we’ve flooring options to suit all homes. Take your time looking through our collection and don’t forget to request free samples of the floors you like.
You can also visit our flooring advice hub for more insightful guides like this one!


